
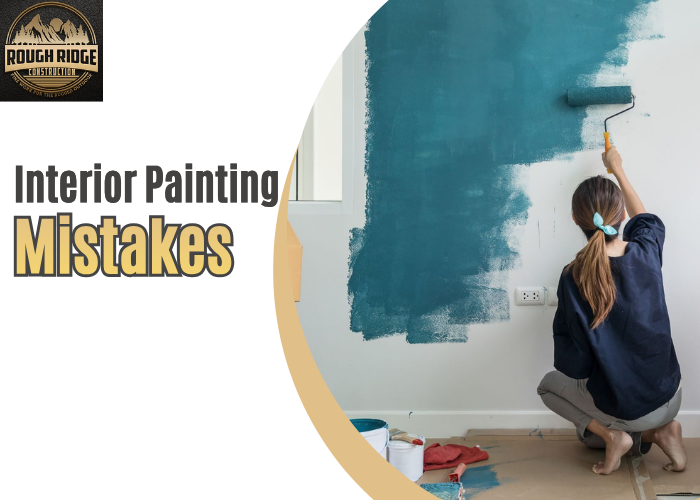
A fresh coat of paint should transform a room — not become an expensive regret. Here’s what most homeowners get wrong before the first brush ever touches the wall.
Paint is the most affordable finish in any remodel — and the most visible. It covers every wall, wraps every corner, and sets the tone for everything else in the room. Done right, it makes a $500 light fixture look like a thousand-dollar upgrade. Done wrong, it makes a beautiful renovation feel unfinished no matter how much was spent on everything else.
The frustrating part? Most painting mistakes aren’t about technique. They’re about skipping steps, rushing the timeline, or making decisions with a color chip under fluorescent hardware-store lighting. Here are the most common interior painting mistakes — and how to avoid every single one.
The Mistakes —
Skipping Surface Prep — the Most Expensive Shortcut
Wall prep is invisible once the paint dries, which makes it tempting to rush. But paint doesn’t fix walls — it magnifies them. Every crack, nail hole, scuff, and grease smear you skip past will reappear under fresh paint, often more visible than before because the new color draws the eye straight to the imperfection.
Before any primer goes on: patch holes with spackle, sand the patches smooth, wipe down surfaces with a damp cloth or TSP substitute to remove grease and dust, and lightly sand glossy areas so the new paint has something to grip. In kitchens and bathrooms especially, skipping the degreasing step causes paint to peel within months.
Pro Tip
After patching and sanding, run your hand flat across the wall with the lights off and a work lamp raked at a low angle. That harsh sidelight will catch every imperfection a normal room light hides. Fix what you find before priming — you won’t get a second chance.
Not Using Primer — or Using the Wrong Kind
Modern “paint-and-primer-in-one” products have convinced a lot of homeowners that primer is optional. It isn’t — not in most real-world remodeling situations. Going over bare drywall without primer causes the paint to absorb unevenly, creating dull spots called “flashing” that no number of topcoats can fully fix. Going over a dark color without a dedicated primer means you’ll need four or five coats instead of two.
Use a dedicated primer when you’re painting over bare or repaired drywall, making a dramatic color change, painting over a glossy surface, or dealing with stains, knots, or smoke damage. For stains specifically — water marks, crayon, permanent marker — a shellac-based primer like Zinsser BIN is the only product that reliably seals them before they bleed through.
Choosing Paint Color From a Two-Inch Chip
Color chips are marketing tools, not decision-making tools. A two-inch swatch under store lighting looks completely different from a full wall under your home’s specific mix of natural and artificial light. Colors shift dramatically depending on the direction the room faces — north-facing rooms pull colors cool and gray, south-facing rooms warm them significantly. A color that looks like a calm sage in the store can read as army green on your walls.
The right process: bring home several chips you like, tape them to the wall in different spots (including a corner where two walls meet), and observe them at different times of day — morning, midday, and evening with your actual room lights on. Better yet, buy sample pots and paint 12-inch squares directly on the wall. Live with those samples for two or three days before making a final call.
Worth Knowing
Paint always dries slightly darker than the wet color on the chip. If you’re torn between two shades, it’s almost always safer to go lighter — you can layer depth with furnishings and décor, but you can’t easily walk back a color that feels oppressive once it’s on four walls.
Buying Cheap Paint and Making Up for It in Coats
Budget paint feels like smart saving until you’re applying your fourth coat and the coverage still isn’t there. Low-cost paints have less pigment and fewer solids per gallon, which means more coats, more labor, and more time — which usually ends up costing more than the premium paint would have in the first place.
Quality paint from a reputable brand covers better, levels smoother, resists scuffs and washability tests dramatically better, and holds its color longer. For high-traffic areas — hallways, mudrooms, kids’ rooms — the finish durability difference between a $35 and a $65 gallon is genuinely significant. Spend the money on the walls you’ll look at every day.
Picking the Wrong Finish for the Room
Flat paint hides imperfections beautifully — and also holds onto every scuff, fingerprint, and water splash, often permanently. Eggshell and satin offer a gentle sheen that’s far more washable while still being forgiving on imperfect walls. Semi-gloss and gloss are durable and moisture-resistant, but they mercilessly reflect every bump and roller mark on the surface beneath.
A practical guide: flat or matte for low-traffic bedroom ceilings and accent walls, eggshell for most living areas and bedrooms, satin for hallways and kids’ rooms, semi-gloss for kitchens, bathrooms, trim, and doors. Mixing finishes purposefully — satin on the walls, semi-gloss on the trim — creates visual contrast and actually makes a room feel more polished and intentional.
Not Protecting What Shouldn’t Be Painted
Every professional painter spends significant time on protection before a brush is loaded. Paint on hardware, outlets, light fixtures, window glass, hardwood floors, and countertops is not a minor inconvenience — it’s a rework job. Dried latex paint on a polished hardwood floor or a chrome fixture can require hours of careful removal and still leave permanent damage.
Remove hardware entirely where possible. Use proper painter’s tape on trim and edges — press it down firmly with a putty knife edge to prevent bleeding. Drop cloths over every horizontal surface, taped down at the edges. It takes 45 minutes before you start and saves hours of scraping and cleaning after.
Rushing the Drying Time Between Coats
Paint that feels dry to the touch and paint that’s actually ready for a second coat are two different things. Applying a second coat too early traps moisture, which can cause peeling, bubbling, and an uneven finish that shows every brush or roller stroke. The problem won’t be obvious immediately — but within a few weeks, it will be.
Always follow the manufacturer’s recoat time on the can, and extend it in humid or cool conditions. High humidity dramatically slows curing — a day that calls for two-hour recoat times in normal conditions might actually need four or more hours when it’s raining outside. Running a dehumidifier in the room while painting can meaningfully speed up the process.
Rule of Thumb
When in doubt, wait. An extra hour between coats costs you an hour. Peeling paint costs you a full repaint, which costs you a weekend and another full gallon.
Painting Over Moisture and Mold Problems
Fresh paint over an active moisture problem doesn’t solve anything — it conceals it briefly and then fails in a highly visible way, usually with bubbling, staining, or peeling that looks worse than the original problem. Mold behind paint continues to grow and will eventually return to the surface regardless of how many coats are applied over it.
Identify and fix the moisture source first: leaky pipe, failed caulk around a tub or window, inadequate bathroom ventilation. Treat visible mold with an appropriate antimicrobial solution and allow the area to dry completely — often several days. Then prime with a mold-inhibiting primer before finishing. In bathrooms and basements especially, this sequence is non-negotiable.
Inconsistent Lighting During and After Painting
Many painting issues — uneven coverage, missed spots, lap marks — are invisible under work lights or bright overhead lighting but become obvious once the room is furnished and lit the way it’ll actually be used. This is especially common when painting with darker or richer colors, where thin spots telegraph clearly under warm, directional light.
Check your work under multiple lighting conditions as you go. Raking a portable lamp across the wall at a low angle after each coat will show thin areas, lap marks, and roller texture before they’re buried under another layer. Better to catch it and fix it during the job than discover it when the furniture’s back in place.
Pulling Tape at the Wrong Time — or the Wrong Angle
Painter’s tape pulled too late — after the paint has fully cured — can pull the paint film off the wall with it, leaving a jagged, chipped edge instead of the clean line you spent careful time creating. Tape pulled too soon, while the paint is still tacky, can smear fresh paint under the tape and ruin the line entirely.
The sweet spot is while the paint is still slightly tacky but has formed a skin — typically one to two hours after the final coat, depending on conditions. Pull the tape back slowly at a 45-degree angle, peeling back over itself rather than away from the wall. If the edge is imperfect, a small artist’s brush with the trim color cleaned up immediately fixes it without another full tape job.
“In a remodel, paint is the last thing installed and the first thing seen. Getting it right isn’t about talent — it’s about patience and not skipping the steps that don’t show.”
— Rough Ridge Construction LLC
Ready to Do It Right the First Time?
Interior painting is one of those projects that rewards patience, preparation, and the right materials — or punishes rushing. If you’re in the middle of a remodel and want the finish to match the investment you’ve made, take the time to do it properly.